Wednesday, 1 July 2020

Do you still make these??

Alas, I am now unable to source all the parts required to produce these, so the production run has come to an end.


I am often asked if if still make the BelfryBoy logger, and the simple answer is "Yes!"

I make them to order as and when a order is placed, but there can be delays if I am busy with my paid employment or family.

Usually the biggest delay is if I run out of circuit boards or 3d printed covers, since these are manufactured by a third party and usually have at least a 2 week lead time.

It is getting increasingly difficult to source the dataflash chips, and I believe that I have a years worth of stock left, so watch this space

Sunday, 11 March 2018

Dragging my assembly process into the 20th century..

From the day that I started building these loggers, back in 2011, I have hand soldered every single one of them. Whilst I do not find this particularly hard to do it is now proving more time consuming since I have added more components to the board to bring it in line with the recommended design from FTDI. to improve the assembly time I made the decision to use solder paste and a DIY reflow process.

For those of you not familiar with reflow soldering a good introduction can be found on the sparkfun website

I have, in the past, worked for a reasonably large PCB assembly company, and so I am familiar with the processes involved, so this wasn't all new to me. I didn't feel the need to go down the route of buying a reflow oven, but also wasn't keen on converting a toaster oven. I have used my hot air rework station, but often found that the smaller components are displaced. So I settled on using a hotplate.

I bought my stencil from OSHStencils. The prices are very reasonable, the quality is excellent and the delivery is quick. You have the option of ordering a support frame (cut acrylic) and can select the border size around your design. Simply upload the paste layer from an eagle design, follow the design wizard, and receive your stencil in a short time.

Logger board held in support frame with stencil raised.
With the stencil aligned with the pads of the PCB I taped along the top edge to provide a hinge.


Stencil ready for solder paste.
Using a squeegee the solder paste is applied to the board in a smooth single wipe, the stencil is carefully lifted away, and the frame lifted allowing the prepared board to removed.

Paste applied to the Bare PCB.
 The components are then added, taking care not to smudge the paste. The components do not require perfect placement at this time, surface tension of the solder will pull them into place

Components in place.
Once all the components are placed the board is then placed on the hotplate. Using an infra-red thermometer I have identified a spot on the hot plate that sits around 220 degrees (C), this is hot enough to activate the flux and flow the solder paste in around 30 secs.

The completed board.

Overall I am happy with the result. It has reduced my assembly time by around half. Occasionally the smaller components experience "tomb-stoning" where only one end of the component adheres to the board and is lifted, but this is easily rectified using the hot air rework station.

The final stage involves fitting the main connector and USB cable, with potting compound applied to finish off the whole assembly.


Saturday, 10 March 2018

It been a long time, and there have been some changes...

It's been over a year since I've updated this blog, due to work commitments and other pressures on my time. I am still building the loggers, and shipping worldwide.

I have had a number of users report that the logger communication over USB is unreliable when using Windows 7, so I had a look at my design and made some changes to bring it in line with the recommended layout from FTDI.

Also I have added a 3D printed cover to provide better protection to the circuit board and provide strain relief for the cable.

I have also made changes to the way that I assemble the boards making the process more efficient, I will details this in my next post...

Saturday, 7 January 2017

New year - New PCB

Well it was bound to happen some time; the dataflash chip that I use (Adesto AT45DB011D-SSH) has now gone obsolete. This isn't the end of the, or so I thought...


My solution was simply to fit it with the 4 Mbit version, but unfortunately the console reads the chip ID as part of its "security" checks, and if it does not receive the ID for a 1 Mbit chip it ceases communications.

I have been able to source the chip in an alternative UDFN-8 package, so a little work was required to tweak the PCB to accept the new part. This also means that I now have to program the security register with the chip fitted, again no big deal.

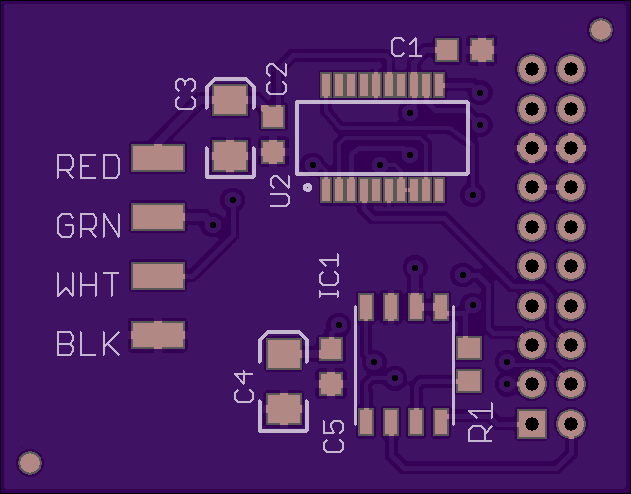
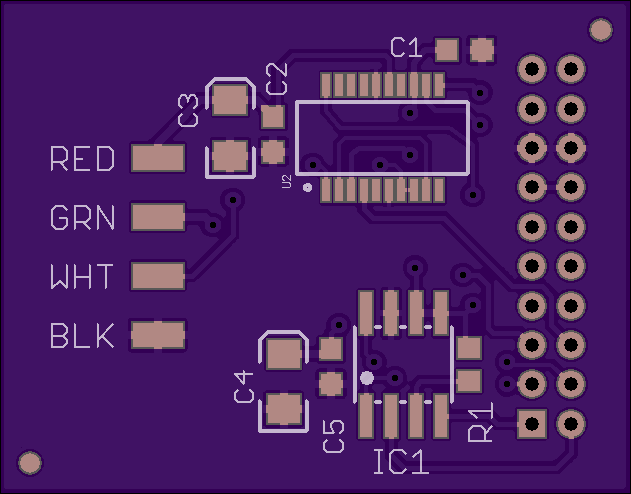
The new PCB
Vs the old PCB
This does mean that in the long term I will have to get my head around a way forward. I could simply buy as many chips as I need for the next year, or I could come up with a smarter alternative. Who knows what this year will bring...

Monday, 5 December 2016

*UPDATE* an end of year evolution

A few days ago I posted images of the latest evolution of the BelfryBoy data logger, using a 3d printed cover filler with epoxy to give a nicer finish the the assembly.

the print house that supplied the covers weren't 100% happy with the result so they ran the print again and the results are fantastic! very clean lines, great curves, and dimensionally perfect! Many thanks to 4th Room, St. Anne's!

Here are the results.


Wednesday, 30 November 2016

An end of year evolution

I have been busy this year with moving house, starting a new job and getting my girls settled into a new school, so there hasn't been a great deal of time to work on the BelfryBoy logger.

Despite all this I recently decided to address the aesthetics of the unit, since I have never been completely happy with how the finished logger looks.

I had looked into some sort of low pressure over moulding, like this service from Techsil.

But I decided that in the volume that I make these I couldn't really justify the expense.

I then happened upon the idea of 3d printing a shell that could then be filled with epoxy resin. The design work was all done using onshape, a fantastic cloud based CAD modelling tool, and then printed via 3dhubs, another brilliant online resource.

So here is the first of the finished covered loggers, it's a bit rough round the edges still, but with a little work I hope for a much more professional look.
BelfryBoy Logger with 3d printed cover

A nice little touch


Tuesday, 19 January 2016

If it looks to good to be true.... or Caveat Emptor


Today I had a major upset in the build of this last batch of V2.1 loggers. My usual (reputable) supplier of FT232RL chips was out of stock, so I found a supplier on eBay. Unfortunately the chips were counterfeit.  They looked almost identical, but when plugged into my laptop they reprogrammed themselves, and became non functional.
FT232RL chip fitted

The one on the left is genuine, on the right counterfeit!


It was in the end relatively trivial to edit the driver to function with these loggers, but I'm not willing to ship counterfeit goods to paying customers. This combined with a house move this weekend has severely impacted on my ability to supply all the orders that I received over Christmas. 
](*,)

Normal service should be resumed in the next week once the new workshop is up and running.